Return to the guide home page >>
“Signal” is an open source application for instant messaging that uses end-to-end encryption, “Signal” can be used on Android and iOS smartphones, and on Microsoft Windows, Mac OS, and GNU / Linux computers after registering with a mobile phone number. “Signal” provides automatic deletion of messages after a specified period of time, whether in chats between individuals or groups.
“Signal” is an open source application for instant messaging that uses end-to-end encryption, “Signal” can be used on Android and iOS smartphones, and on Microsoft Windows, Mac OS, and GNU / Linux computers after registering with a mobile phone number. “Signal” provides automatic deletion of messages after a specified period of time, whether in chats between individuals or groups.
Privacy and Security Options in “Signal”
- To access the privacy settings in “Signal”, tap the settings icon in the top right of the screen.
- From the menu, tap “Settings”.
- From the menu tap “Privacy” to access the privacy settings.


1. Screen Lock for “Signal”
- To access the privacy settings in “Signal”, tap the settings icon in the top right of the screen.
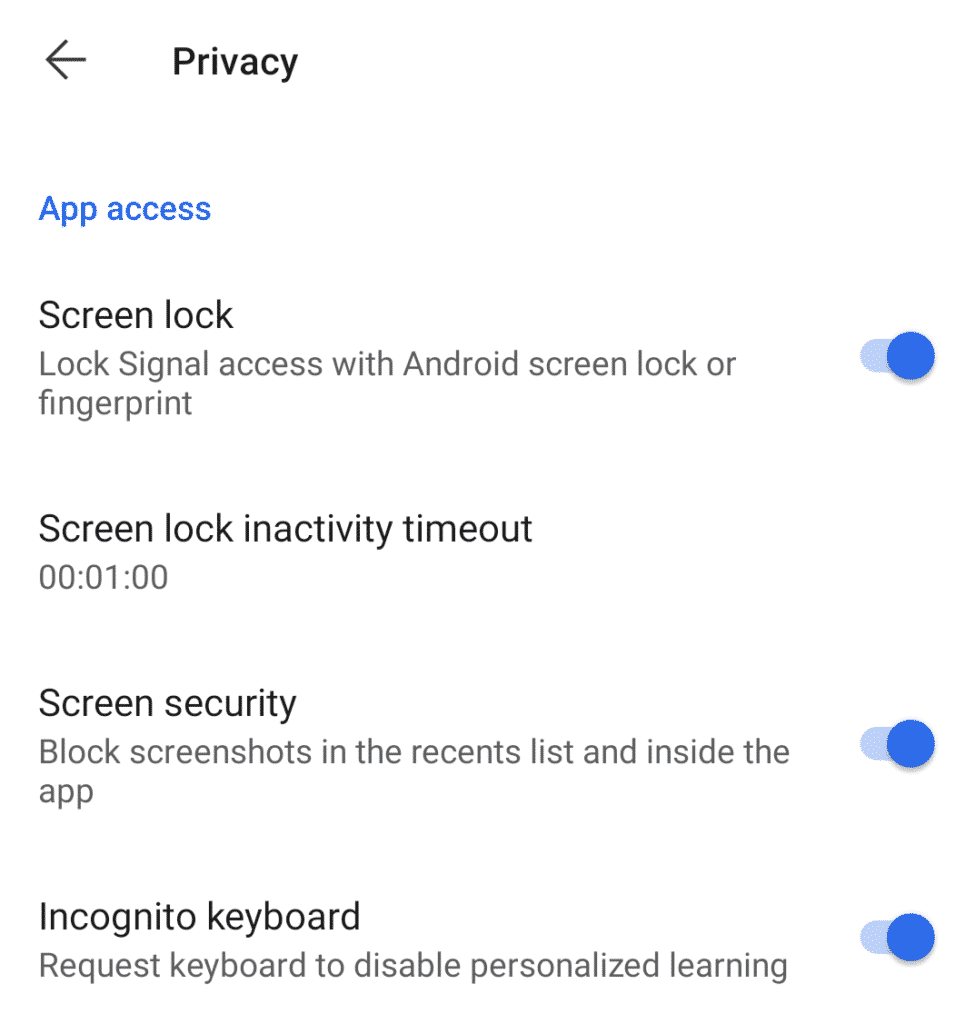
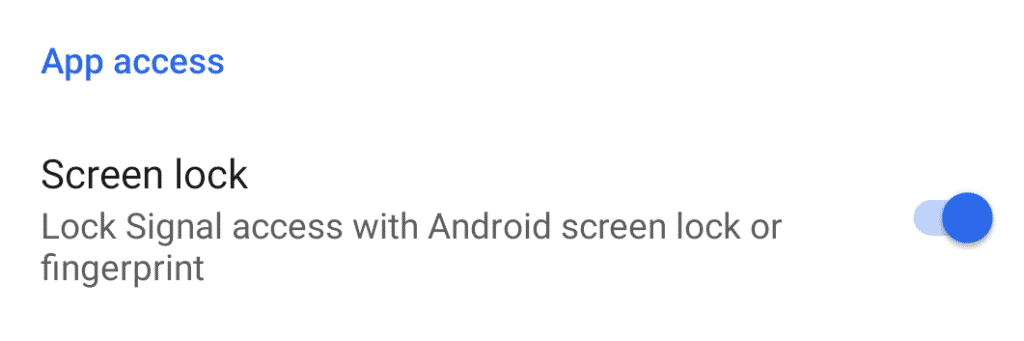
Activating the “Screen Lock” Feature
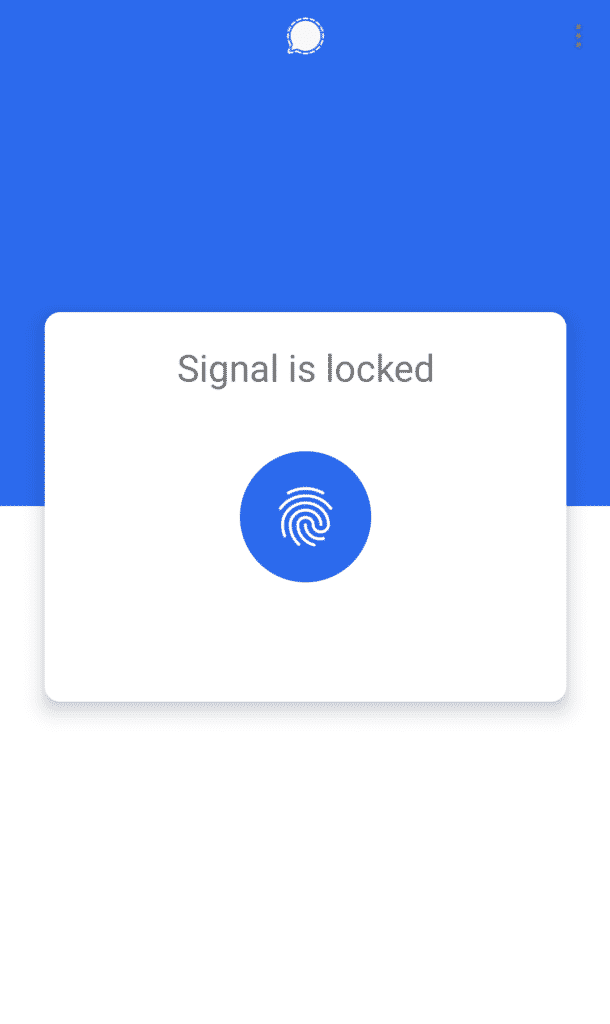
- Tap “Screen lock” to activate accessing “Signal” with the fingerprint or password used to access the phone, when this feature is activated, you will have to use your fingerprint every time you want to access “Signal”.
- A time period can be specified for “Signal” to automatically lock access to the application after inactivity timeout, as shown in the following picture.
- After activating this feature, the screen will appear as in the following picture every time you want to use “Signal”.

Block Screenshots in “Signal”
- Activating this feature will allow “Signal” to block any attempt to take screenshots in the application, it should be noted that activating the feature does not prevent other parties in the conversation from taking screenshots.

Incognito Keyboard
- This feature requests keyboard to disable personalized learning in the application.

2. Communication
- The second section in privacy settings is related to communications, and in the following points we will review the options provided by “Signal”:
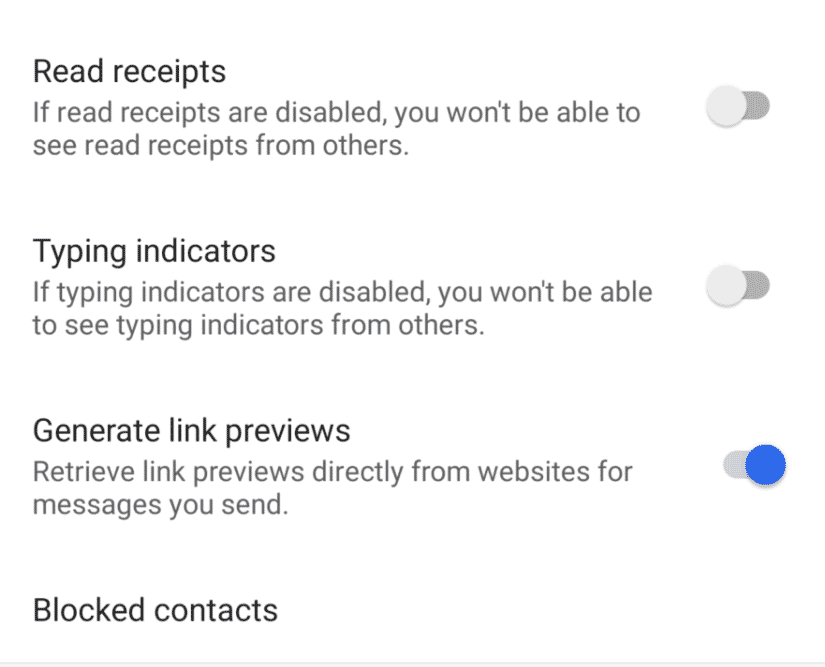
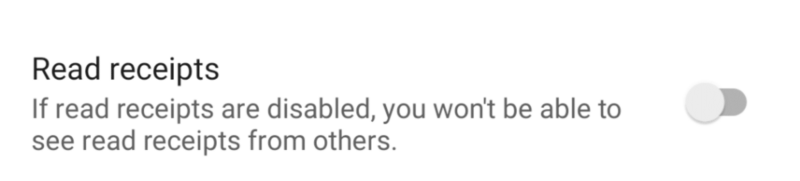
Disable Read Receipts
- When disabling read receipts other parties in the conversation, whether with individuals or groups, will not know if the message receiver read it or not.
- If read receipts are disabled, the user will not be able to see read receipts from other parties in the conversation.
- When disabling read receipts other parties in the conversation, whether with individuals or groups, will not know if the message receiver read it or not.
- If read receipts are disabled, the user will not be able to see read receipts from other parties in the conversation.
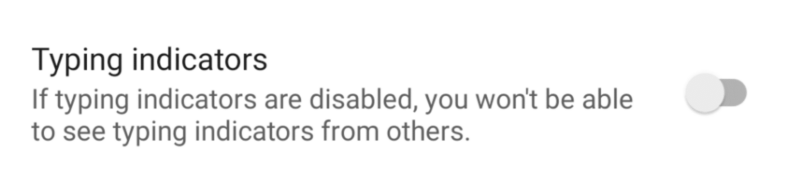
Disable Typing Indicators
- When disabling typing indicators other parties in the conversation, whether with individuals or groups, will not see the typing indicator when the user is typing a message.
- If typing indicators are disabled, the user will not be able to see typing indicators from other parties in the conversation.
3. Signal Pin
- The third section in privacy settings is related to locking “Signal” with a PIN to protect information and data stored in the application, the PIN will keep information stored with “Signal” encrypted until the user types the PIN.
- In case of reinstalling “Signal”, the user can restore settings and contacts after writing the PIN.
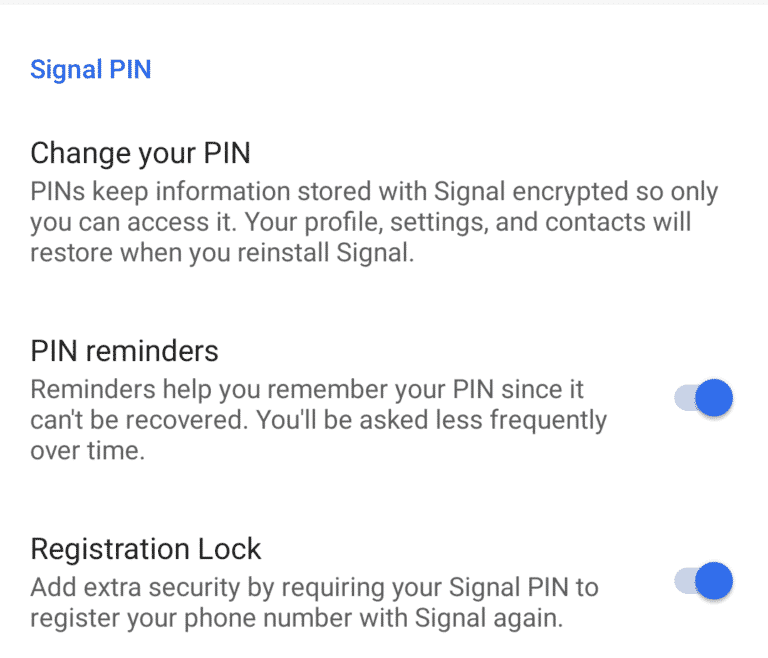
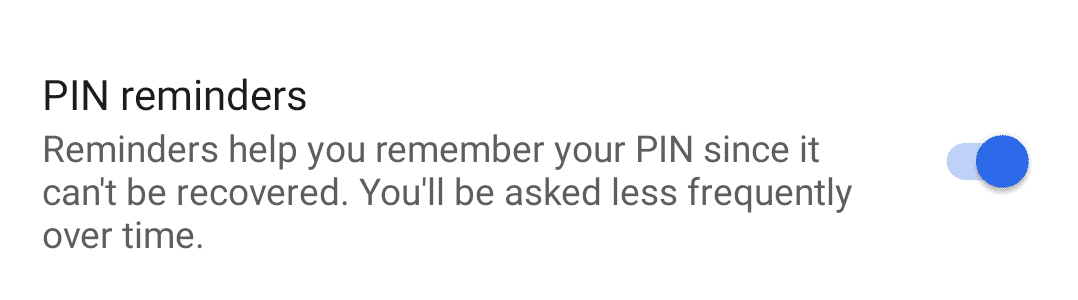
Activating PIN Reminders
- When activating this feature, “Signal” will ask the user to type the PIN at different times to help them remember their PIN, since it cannot be recovered.
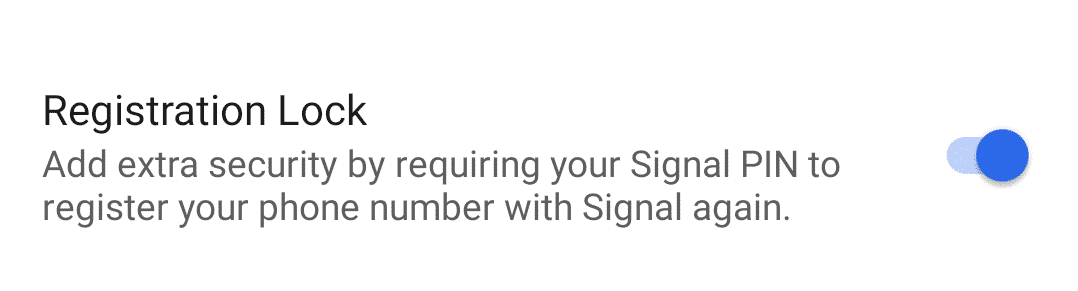
Activating Registration Lock
- When activating this feature, the user will asked to enter the PIN if they want to register their phone number with “Signal” again.
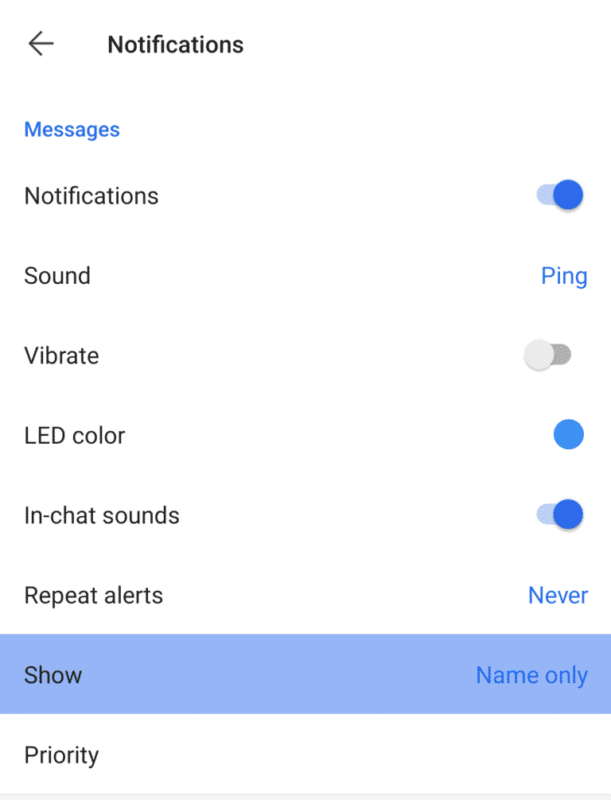
4. Notifications
The user can specify the data that appears in notifications when receiving a new message, it is possible to choose “Name and message”, “Name only” or “No name or message”. To control notifications follow the upcoming steps:
- Tap the settings icon in the top right of the screen.
- From the menu choose “Settings”.
- From the menu choose “Notifications”
- A menu will appear, tap on “Show” to specify that data that appears in notifications when receiving a message.
- From the menu, you can choose one of the three options “Name and message”, “Name only” or “No name or message”. Each user can choose the option that suits them.

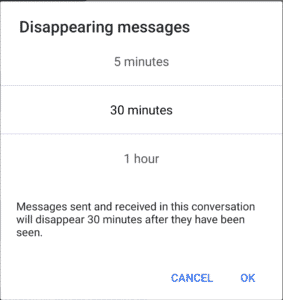
Disappearing Messages
“Signal” provides automatic deletion of messages after a period of time specified by the user, from 5 seconds and up to a week, starting from the moment the recipient reads the message, and not from the moment it was sent,. Disappearing messages can be activated in conversations between individuals or groups. To activate this feature, follow the upcoming steps:
- Choose any conversation and tap the settings icon, then from the menu choose “Disappearing messages”.
- From the menu, each user can set a time after which messages will be deleted automatically.
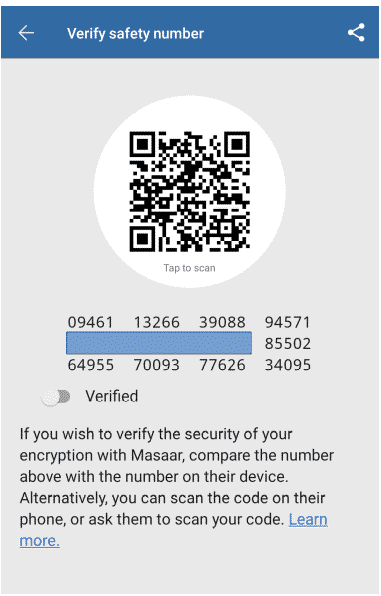
6. Verifying Safety Number
“Signal” provides a safety number for each user so they can verify that encryption is working properly. To verify safety number with any user, follow the upcoming steps:
- From any conversation tap the settings icon, then from the menu choose “Conversation settings”.

- From the conversation settings, choose “View safety number” to verify safety number.
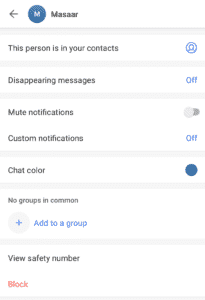
- You’ll see the user’s safety number, and to verify that encryption is working properly, you can compare the number on your device, with the number on the user’s device, or you can scan their code or ask them to scan yours.
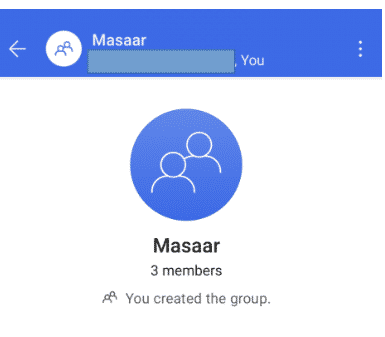
7. Groups
In groups, users can add or remove members, require an admin approval for new members and create a link for the group to share it with others.
Groups Settings
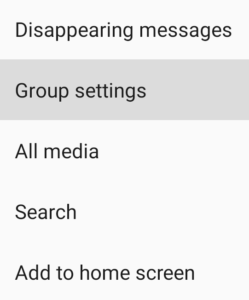
- From any group, tap the settings icon in the top right of the screen to enter the group’s settings.
- From the menu, tap “Group settings”.
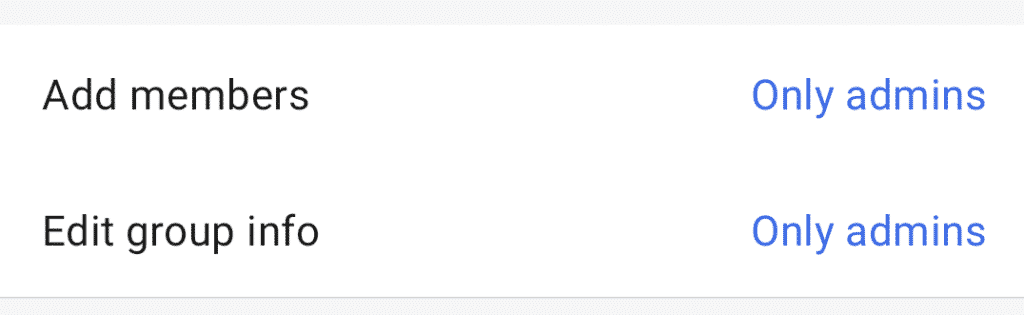
- From this menu you can choose whether all members of the group can add new members and edit group info or only admins have these permissions.
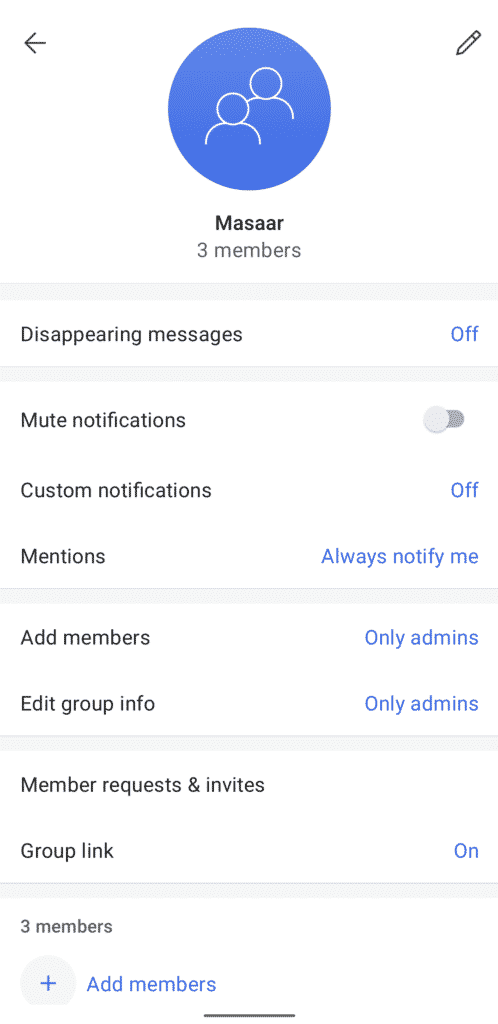
Add members, Edit group info
- From this menu you can choose whether all members of the group can add new members and edit group info or only admins have these permissions.
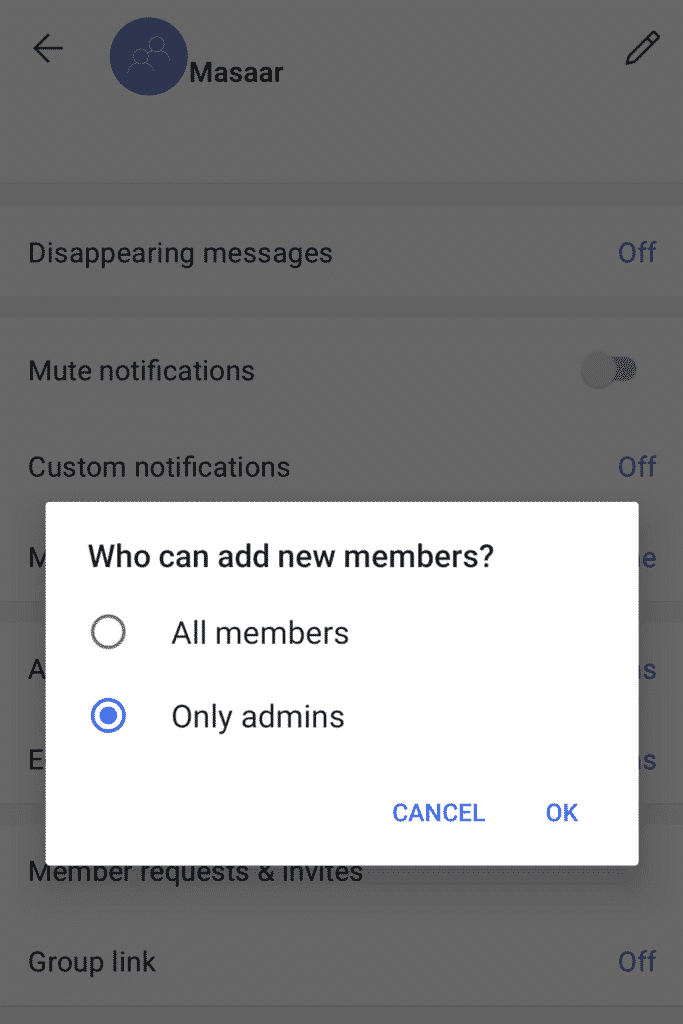
- Tap “Add members” and you’ll see a menu with a question “Who can add new members?”. Every user can choose “All members” or “Only admins” according to their needs.
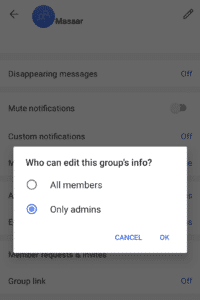
- Tap “Edit group info” and you’ll see a menu with a question “Who can edit the group’s info?”. Every user can choose “All members” or “Only admins” according to their needs.
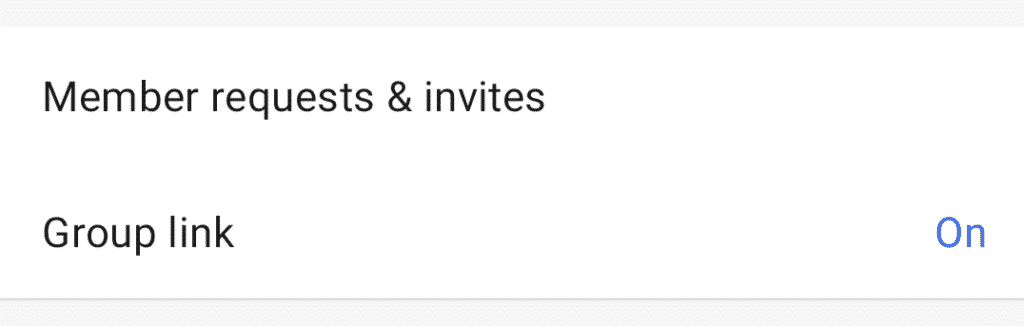
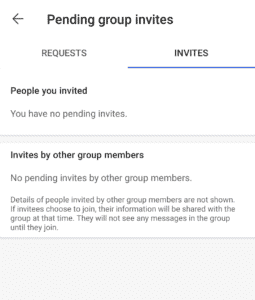
Member requests & invites
- Tap “Member requests & invites” as shown in the following picture.
- From “REQUESTS” you could accept or reject member requests to join the group.
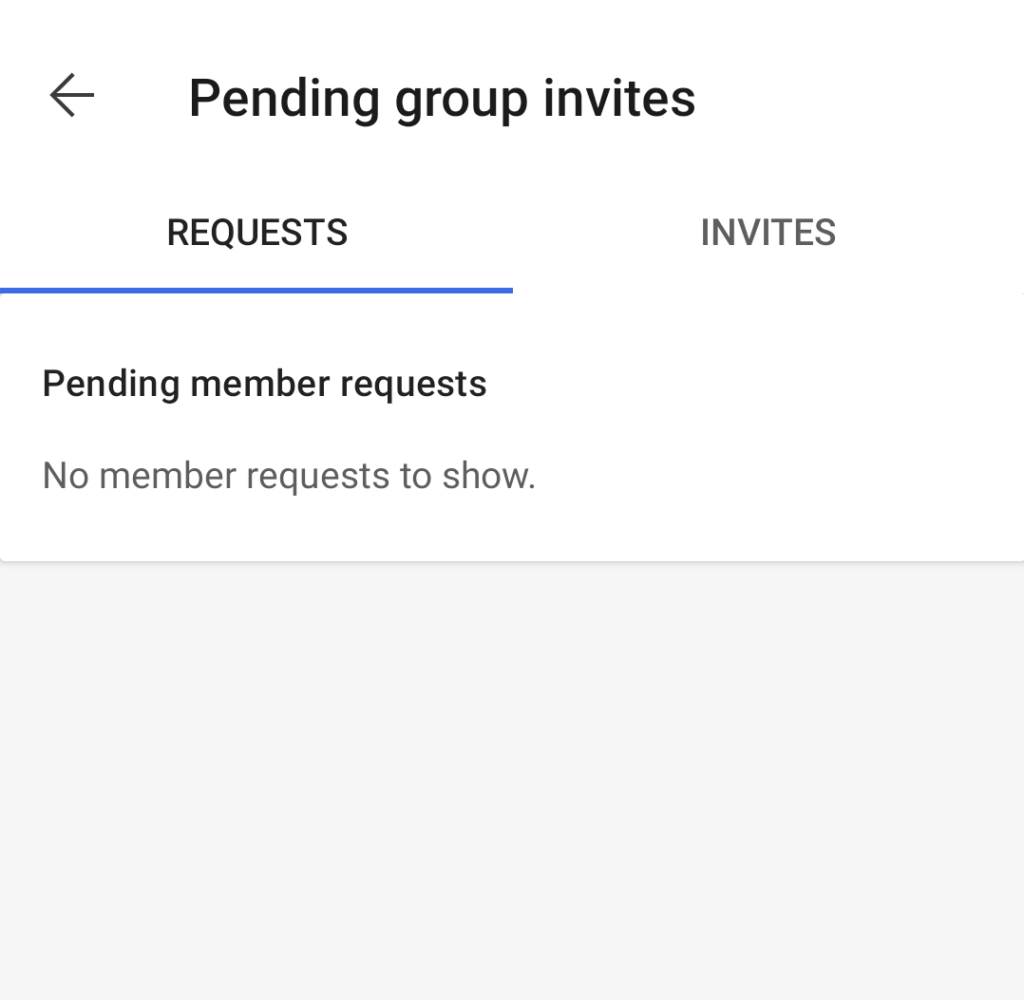
- From “INVITES” you could see members who have been invited, by you or by other members, to join the group and have not yet accepted the invitation.
- It should be noted that information of people invited by other group members are not shown until they accept the invitation, and they will not be able to read any messages in the group until they accept the invitation.
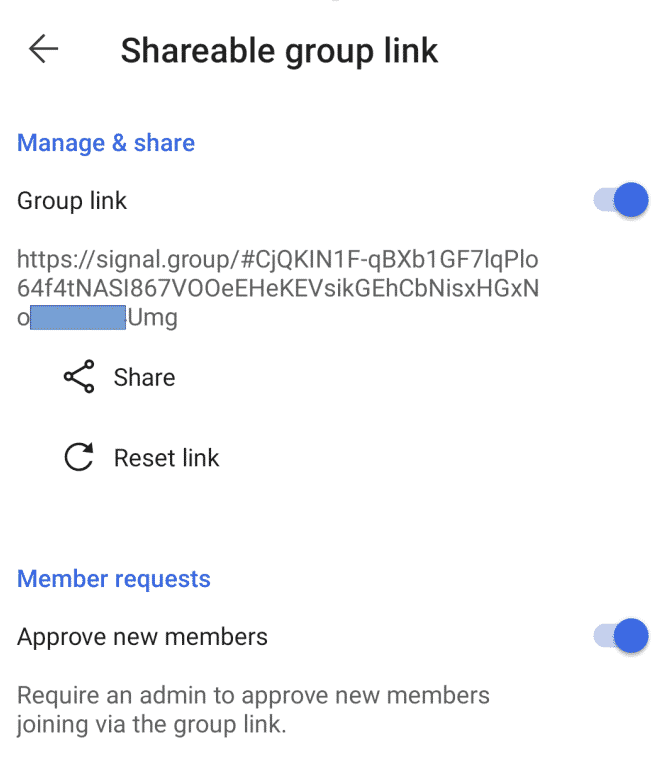
Group Link
- Signal allows you to share a link to a group to invite others to join via the link.
- To activate this feature, tap “Group link” as shown in the following picture.

- Tap “Group link” to enable sharing a link with others to invite them to join the group.
- You can tap “Approve new members” to require an admin to approve new members joining via the group link.
- It should be noted that you can change the group’s link by tapping “Reset link”, but after changing it, others will not be able to join the group using the old link.
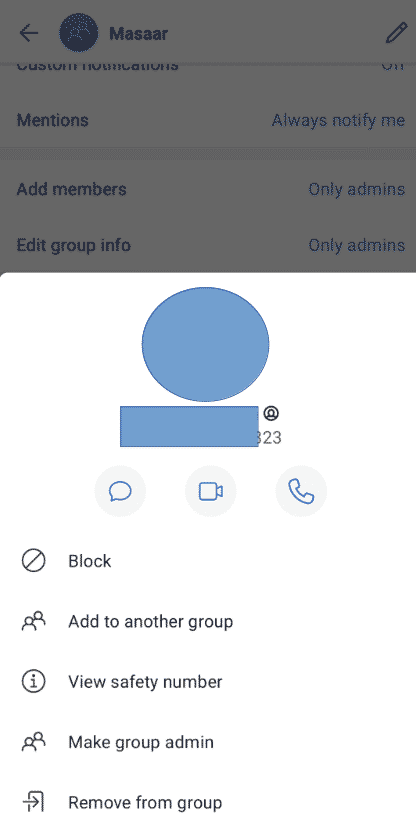
Remove Members
You can remove members from the group, by entering the group’s settings and choosing the member you want to remove then tapping “Remove from group” as shown in the following picture:
8. Making voice and video call via Signal desktop app
Voice and video calls are available on Signal desktop app, and the calls are end-to-end encrypted. You can use the desktop version of Signal by downloading it from Signal website after choosing the operating system you use. After installing Signal, link your phone with the desktop version as shown in the following pictures:
Link your Phone
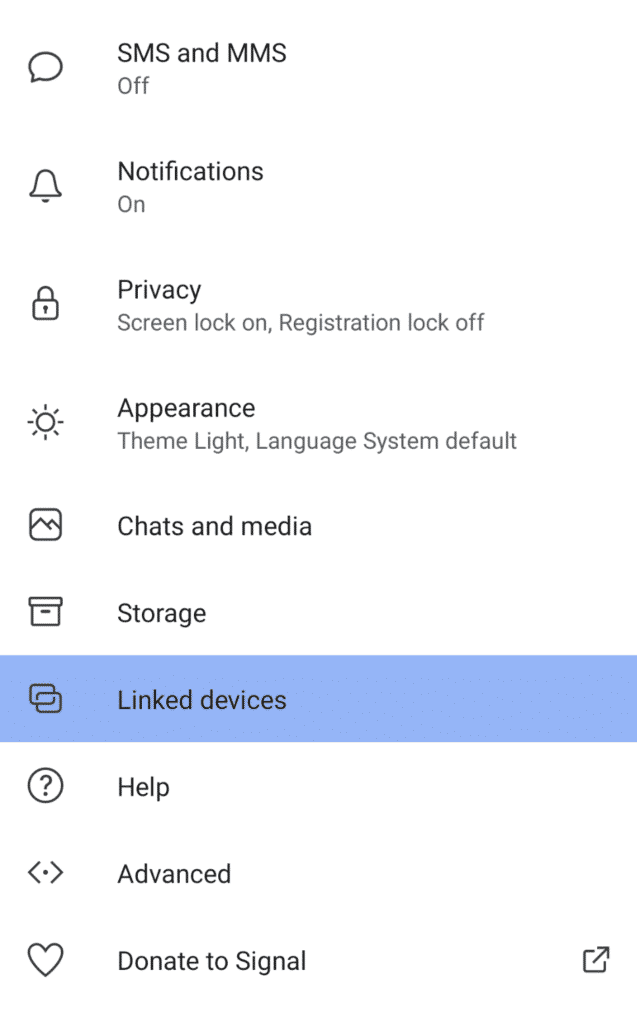
- Tap the settings icon in the top right of the screen.
- From the menu, tap “Settings”.
- From the menu, tap “Linked devices” as shown in the following picture, then through phone scan the code appearing in the desktop version and Signal will connect the phone with PC.
Making Calls on Signal Desktop
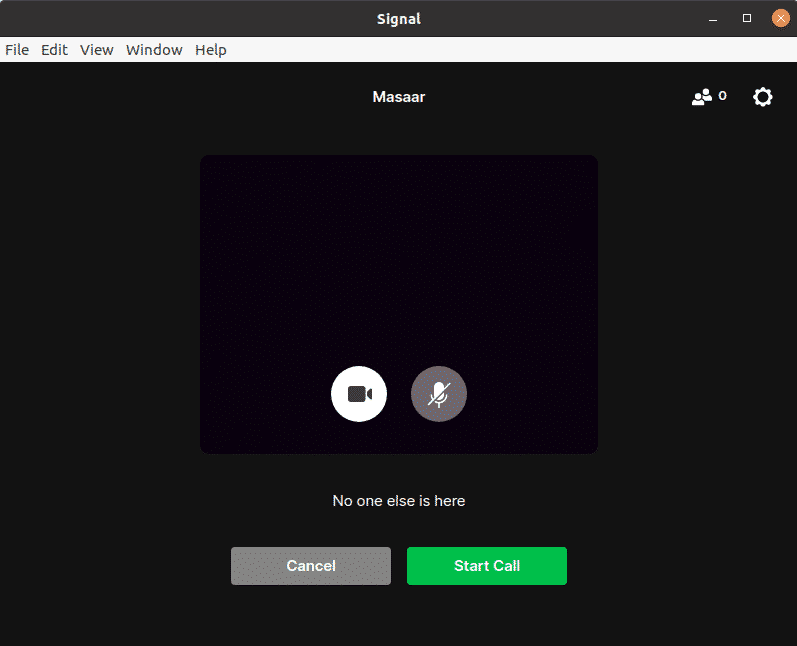
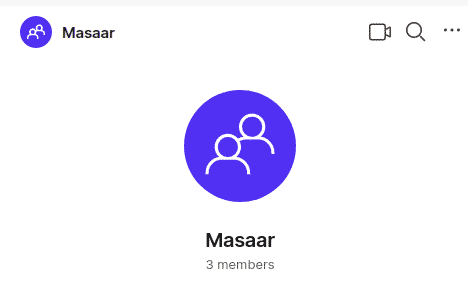
- Choose the group you want to start a voice or video call with then click on the video camera icon in the top right of the screen as shown in the following picture:
- You will see the following picture, from which you can choose whether to start a voice or video call, then click “Start Call”.